April, May and part of June have passed by and now my Eberspacher D4 is installed as I envisaged in the OEM location and on the OEM brackets.
For those who don't know, I purchased a complete new un-opened Eberspacher D4 kit at what I considered to be a very reasonable price so any references to 'standard' Eberspacher parts would have been included in that kit but excluding come of the ducting.
HEATING AIR DUCTING
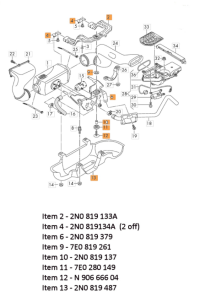
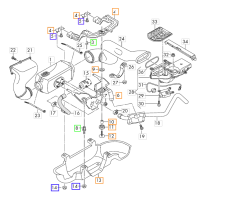
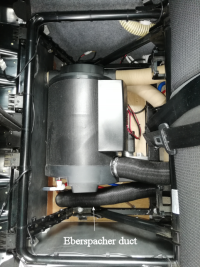
The air ducting is all basic Eberspacher or Webasto parts with a couple of generic vents used where necessary. The ingoing air is fed via an 80mm flexible and 90 degree bend into the wall of the right front foot door step wall in a similar location to the factory fitment.
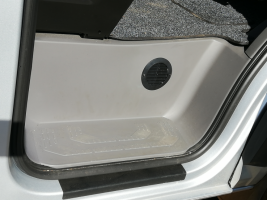
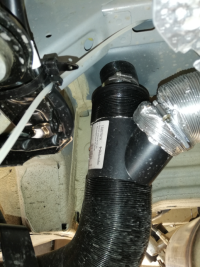
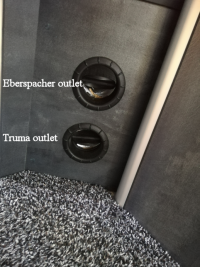
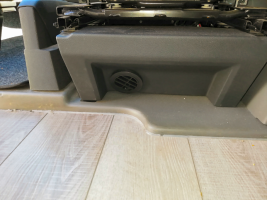
The outgoing hot air leaves the heater as a 90mm flex which bends inwards and up to a 90/60/60 fork, the vertical outlet enters the interior under the right front seat and bends to a standard 60mm Eberspacher rotatable outlet in the base of that seat frame. The fork outlet feeds an insulated 60mm tube to bring it up under the rear seat adjacent to the Truma heater (yes I have duplicate heating) to then duct rearwards towards the bed area.
 COMBUSTION PIPES
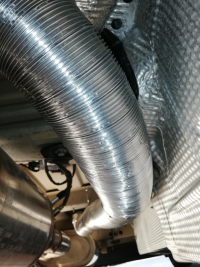
The combustion side of the heater has been relatively simple, the exhaust is a very short bend of standard Eberspacher exhaust flex to join an again standard Eber silencer and then stainless stub pipe. This may prove to be too noisy and need further modification in the future. The inlet side is again standard Eber with the addition of a cheap silencer all tucked up above the heater on the brackets.
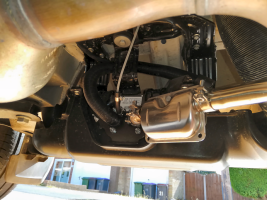 FUEL PIPES & PUMP
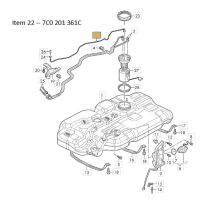
The fuel (diesel) feed begins with dropping the rear of the fuel tank as low as possible without disconnecting anything at the front of the tank. Then snipping the top off the blank tube that protrudes from the top of the tank sender unit and fitting the OEM connector and tube across the top of the tank (MAN 6561960012 £9.30 - VW 7C0 201 361C - dearer!). Somewhat more difficult is dropping the shield below the Adblue tank to mount the heater fuel pump, its mounting and it's associated pipes all of which came in the kit.
I fitted the pump in its rubber mounting bolted between the legs of the Adblue tank bracket with just one hole to drill. It seems remarkably quiet up to now, time will tell!
The fuel pipe between the pump and heater if threaded through the chassis cross member to retain it and shield it from the exhaust heat.
ELECTRICS
This subject frightens many but fifty years ago I was trained amongst thousands of wires not just four or five so I'm somewhat unperturbed by this.
The heater loom come complete in the kit, all that is required additionally is to be able to connect the 12v feed to your desired source, in my case the leisure battery. This I did with a unique cable from the leisure battery to below the left front seat.
The loom plugs into the heater on a single multi way connection then splits three ways, controller, power feed and pump. In my case the loom was fed through the floor under the right front seat before the split then the control section runs up the right 'B' post and into the roof line to the controller location. The power and pump sections are threaded with existing wiring to below the fuse location under the left front seat where the pump one goes down below the floor through a spare portion of the big rubber grommet out over the Adblue tank and to the fuel pump. The power feed connections are connected to the supplied fuse box all as per the supplied wiring diagrams.
CONTROLLER
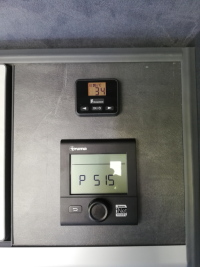
The supplied item is a modern can-bus connected unit with just three wires plus an optional illumination feed. Simple to connect and reasonably simple to use once I'd grasped the meaning of the alternating symbols.
More on the controller and a modification to it later when we have used the heater in anger during four weeks holiday in Europe.
